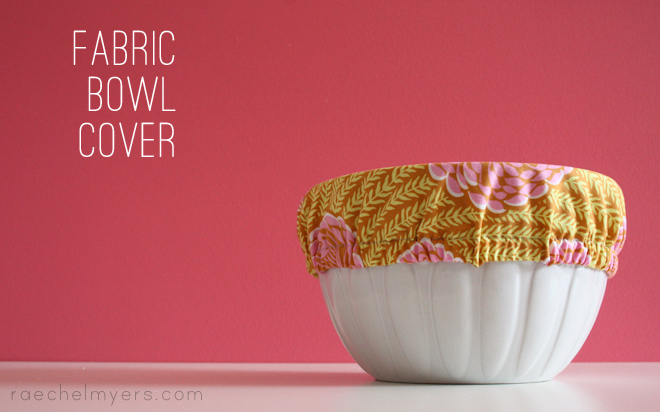
Today, a quick and pretty tutorial just in time for your 4th of July picnics.
Because saran wrap and aluminum foil are uncooperative and unattractive.
And because flies are gross and so is sneezing.
And because summer calls for bright, pretty patterns at every turn.

Best part? You can one-up this one with a bit of embroidery and really make it fun and special!
Bowl Cover Tutorial
What you’ll need:
a bowl
fabric (a square 7″ longer and wider than the diameter of your bowl)
scissors
fabric marker
ruler
elastic (about the length of the circumference of your bowl), 3/8″ wide-ish
safety pin
thread (for construction and embroidery)
iron/ironing board
machines: sewing, serger (optional), embroidery (optional)
Getting Started:
Lay the fabric on your cutting table, wrong side up. Center the bowl on it face down.
With your ruler, make your way around the bowl, marking the 3.5″ out spot in 10-12 places.
You should have a bunch of little marks like this.
Now set the bowl aside and, with your marks as a guide, draw a circle connecting the dots. (If you’re not super confident drawing a circle freehand, just make more dots!!)
Now, cut out your circle.
[follow the next five steps only if you plan to embroider your bowl cover]
And fold it into quarters,
mark the center with a water-soluble pen,
then open it back up.
Center your mark on your embroidery hoop and clamp fabric and stabilizer in place.
create your design (this is the fun part – I have a terrible time deciding on a font!) and give your machine the go-ahead.
watch it go!
when it’s finished, free the fabric from the hoop and tear away that blessed stabilizer.
[now jump back in here if you were skipping the embroidery steps]
To finish the edges of your cover and create the channel for the elastic, you have two options:
1. press the raw edge under twice using an iron, making sure to leave enough space for the width of your elastic.
2. show the raw edges who’s boss with a serger, then turn it under just once.
Either way, you want to create a channel for your elastic. My elastic is 1/2″ wide, and I plan to stitch a 5/8″ seam allowance. So I want to turn it under almost 3/4″.
Now that you’ve done all the pressing for your elastic channel, stitch it down, leaving a 1″ gap for eeking that elastic into place. (again, I used a 5/8″ seam allowance here)
Now, measure the circumference of your bowl. Mine looks like it’s about 28″ around.
Cut your elastic about 1/2″ short of that and attach a safety pin to one end. (this guy will be your might guide through the channel!)
Work the pin all the way around the channel
until you have elastic sticking out on both ends.
Using a zig-zag stitch, fasten the two ends of the elastic together to create a continuous circle.
Let the elastic relax into the channel and stitch closed that final 1″ of channel.
And just like that? Done.
And you’re so fancy and cute with your pretty fabric bowl cover.
So environmentally conscious. So fashionable. So, well, happy!
Isn’t she a beaut?
And the best part? If you’ve got your name on it, it’s not going to get lost! Cheers!
and of course, because I love a good animated .gif as much as the next guy… the bowl in action:
Happy Tuesday, friends. Have a safe and happy Independence Day! What a gift!
Disclosure of Material Connection: I received the Brother PE500 machine mentioned above for free in exchange for a mention of the product in my blog. Regardless, I only recommend products or services I use personally and believe will be good for my readers.


Love it!! Now if I could only learn to sew… ;-)
Hailey,
Have you seen my Sewing 101 series? It’s for non-sewists who want to learn! About 20ish lessons with lots of pictures and videos. Give it a try!
http://raechelmyers.com/sewing-101/
Raechel
Ooh, I’m going to have to look at that because I have a brand new sewing machine that has been used once!
I want the embroidery machine!
But really: this is cute. I don’t believe I’ve seen a tutorial for this sort of thing before, so you win the internet!
I humbly accept this award. Winning the internet is something I’ve wanted to do ever since 2009 when I reached the end of the internet.
I’d like to thank my lappy and my computer and my Christine.
Amen.
Did you come up with this all on your own? I am thoroughly impressed.
it’s official: your awesomeness knows no bounds. LOVE this idea (and if i starred in that end animation, we’d have an extra image of me dropping the bowl.) :)
Love it!! I wish I had a serger…. Anyway, I made something similar but for a different purpose – to keep mosquitoes away from standing pail of water
LOVE IT! I have bookmarked this to make when I learn how to sew.
i saw these at a handmade market recently and wanted to make some out of oilcloth! thanks for the tutorial, i had forgotten about it until now! :)
what a super fun idea! I’ve never seen or thought about that- i believe I’ll try it out soon(I hope!).
I used your tutorial for a wedding gift this weekend! It turned out great! Thank you!! Here’s a link to the post I did about it!
http://www.moxiemadeblog.com/2012/07/wedding-gift.html
Love this tutorial! I can’t wait to make one! Thank you so much for posting this!!!
I love this idea, and I adore the fabric you used.