Since you asked so nicely, I have put together a quick (yet thorough and hopefully helpful) tutorial on how to convert girls knee socks to adorable leg warmers for your little guy or gal.
(Have I mentioned that these are not only a great looking baby accessory, but they also serve a nice, functional purpose as well? I love not having to mess with pants when I need to do a quick diaper change. This keeps baby’s legs warm, without having to mess with taking off and putting on pants every time she needs changed!)
Ok, so here’s what you need:
- 1 pair knee socks (may I recommend the $2 knee socks at Target?)
Also, these would be pretty cute. - Rotary cutter, cutting mat and straight edge (or, just a pair of scissors would be fine and much less fussy)
- Sewing machine, ideally. But if you don’t have one handy, you can definitely hand stitch with this project!
- Somebody little with cold legs.
And, here’s what you do:
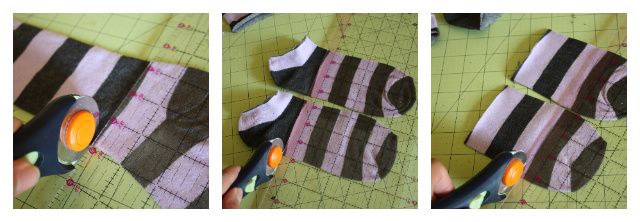
Begin by making three cuts – one at the ankle (to remove the foot), and two at the foot (one to remove the heel and one to remove the toe).
Your socks will now look something like this:
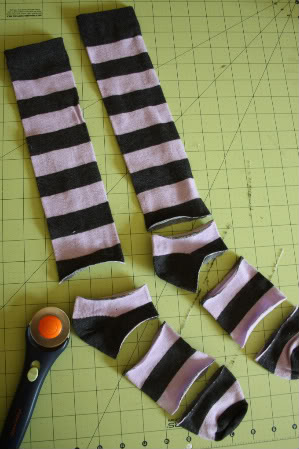
You can discard the heel and toe, unless you have any great ideas for how to utilize these??
Now, we’re going to focus on the foot piece.
It will become your new cuff, or the bottom, finished edge of your legging.
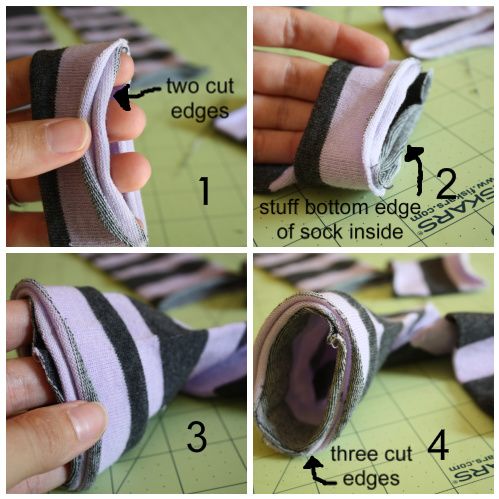
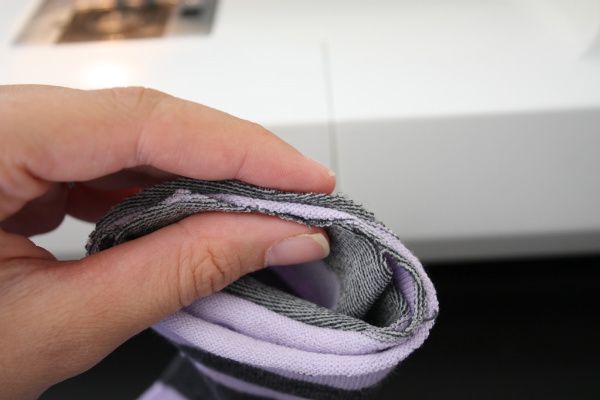
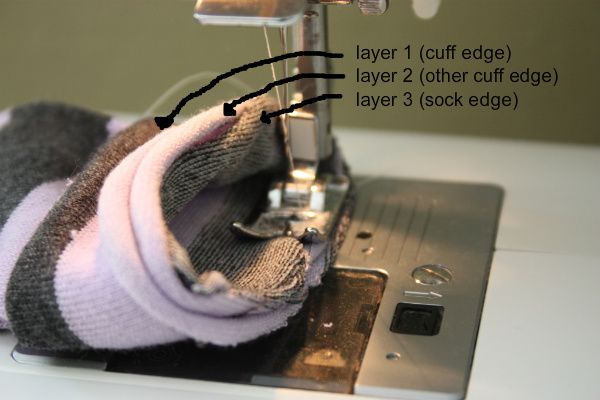
Begin by folding it wrong sides facing each other, so that you have two cut edges facing one direction (1). Then, stuff the cut end of the sock into your new cuff (2 & 3) so that you now have 3 layers of cut edges all facing the same direction (4).
How about those funky little arrows? Eh? Eh?
Still with me?
Now, grab hold of your three layers and march them over to your machine. (or to your needle and thread if you roll that way)
You will be stitching the three layers together with about a 1/4″ – 1/2″ seam allowance.
I use a straight stitch, though I know a lot of folks might suggest a zigzag stitch or even a serging stitch if you have that option to keep the fabric from unravelling. Straight stitch works fine for me and I haven’t had any unravelling issues thus far.
Run it through your machine, making sure you’re catching all three layers. (It’s tricky to keep all the edges lined up and not rolling. Be firm.)
Note: do your best NOT to give the fabric any resistance or to stretch it while it’s being stitched. It will look funny.
(Again with the arrows. You like?)
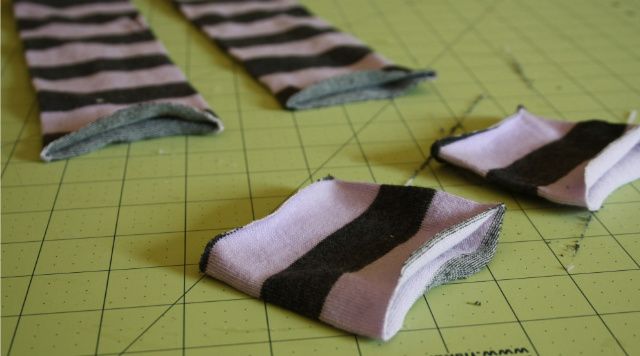
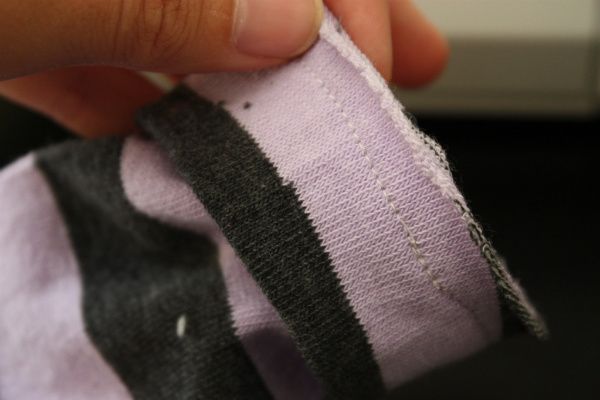
This is what it should look like once it’s stitched. Perfect is great. But if it’s not, it’ll be just fine!
Now, for the moment we’ve all been waiting for!
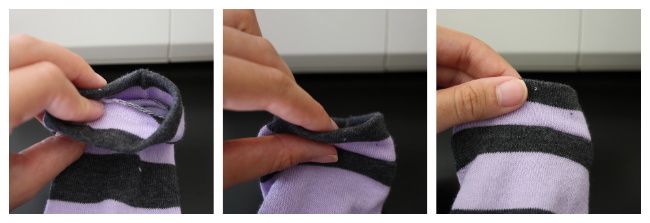
Flip the cuff up to conceal the stitching and to make it look like a legging.
(yes, all three photos really were necessary for the big flip.)
Okay, now do you feel awesome or what?
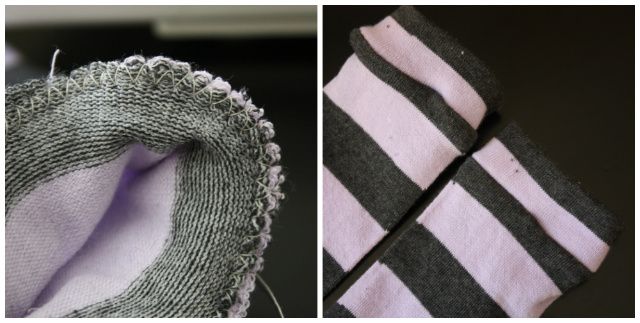
Oh, and for argument’s sake, I sewed the other legging with a zigzag stitch. You can see it stretches the knit more and makes the seam sort of wonky. (The straight stitch is on the bottom and the zigzag is on top. See?)
This would really be an appropriate time to finish with a photo of Hazel in her adorable new lavender and grey striped leggings. I’m not waking her so you’ll just have to imagine.
Happy sewing!


>Thanks for sharing…this is great for a non sewer person (me). I can not wait to try it out. It should help pass the next month while I am waiting on my adopted son to be born! THESE ARE TOO CUTE!
>Thank you for this great reminder. I saw a tutorial on this on BabyCenter several years ago after my first daughter was born. My husband and I had a blast making these from adorable Target, cheap socks (can we say Paul Frank knee socks??….ahhh they were so cute!) It was easy and fun and addicting! Great idea for baby gifts too. I honestly cringe when I see how much BabyLegs cost when these are just as nice and much cheaper!
>These are adorable! LOVING the arrows =)
>oh how this makes me wish for another baby girl! ;) there are always baby shower gifts to be made though. and they would be very cute using "little miss matched" socks! so fun!
>I was so hoping you would create a tutorial for these!!! I stopped at our target today and was so happy to find lots of "gender neutral" $2 target socks on sale for $1.25!!! My first sewing project ever will be these leggings….keeping my fingers crossed! Thanks again.
>how much fun!! ive had my sewing machine out this week working on a couple projects and i am so excited to give these a try!
my idea for using the toe material of the sock after being at my nephew's baby shower this weekend- a pee-pee tee-pee. ;-) although obviously, your little Hazel wouldn't need one of those, but maybe someone else out there could give it a try. :-)
>These are so great for potty training. Thanks for the tutorial!
>just found out on friday that we are having a girl. i was bummed because i was thinking you had to do cloth diapers (we cant use cloth at preschool) to do the legging thing and then i got a clue and realized disposable+bloomers would totally work too. i am such a devoted fan of your creations that i went out and bought 8 pairs of the target socks hours after you poster this and i am SO pumped about not having to change pants a million times in the cold of winter!!! thank you
>I came back to this post today to FINALLY give the baby legs project a try! It was pretty easy and I think they turned out pretty cute!! Thanks again for posting this! :-) (I posted a link to this post, fyi!)
>I've been wanting to make some of these for my little girl for a long time now, but I finally got around to it today. I should have done it a long time ago, it was SO EASY! It really took me less than 30 minutes beginning to end to make 4 pairs (and it only cost $5 total!) I love them – thank you!!!
hey i just looked for this on the tutorial page and i dont think it was there. just a friendly FYI as i start making more batches of these.